Total Pageviews

Friday, 19 March 2010

Crankshaft

Right, time for another update. Having removed the sump I have checked the crankshaft end float. This is 12 thou. The manual suggests the new clearance should be between 5 and 12 thou with a "max permissible return to service wear" of 10 thou (I'm guessing this means that if greater than 10 thou the engine should not be put back into service without new bearings). I've therefore decided I need to replace the thrust bearings and the main bearings at the same time.

When the new thrust bearings arrived, I decided to compared there thickness, the new bearings being 2 thou thicker than the old ones. With a bearing either side of the crank journal this should reduce the end float to about 8 thou ( I hope).
I'm now in a position to start the reassembly process. This feels good after a couple of weeks of un-bolting and removing as many parts as I can.
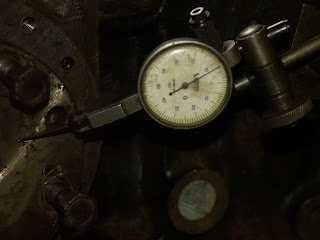
After reassembling the bearings and replacing the rear seal (easy with the sump removed). I used a dial test indicator to measure the new end float. 7 thou and success!
Whilst cleaning up the sump jointing flange on the bottom of the engine, I come across two sets of hand punched figures at either end of the block 'H25' (see bottom photo). I'm intrigued to find out what these signify or mean.

With the sump on these numbers are hidden. Hopefully the FoFH maybe able to provide an answer or two?
Clutch and rear gear box oil seal ordered today as well. So the next job is to remove the gearbox input shaft and replace this seal. Hopefully this should minimise the chance of any future oil leaks.

Monday, 8 March 2010

Crankshaft Pulley

Quick update, I needn't of worried about getting the crankshaft pulley off. The nut came off like a dream with the right sized socket. To stop the crank turning whilst undoing the nut I used a piece of hardwood between the crank and the crankcase.

Pleased with my result, I felt like updating the blog.

Sunday, 7 March 2010

More Engine

Since my last blog, I've managed to ‘find’ a block and tackle. I’m now in a position to remove the engine from the front axle. This will enable me to move the block with greater easy. Therefore the next job is to take off the sump and check the bearings. Having removed the sump, I'm presented with a thick oily mixture in the bottom of the sump that has the consistency of sticky toffee. Better out that in ! (see below).

Looking at the engine internals, my first observation is that the undersides of the pistons are shiny. Is this the answer to why the piston tops were clean compared to the head. I’m strongly of the opinion that the pistons have therefore been replaced.

With the sump off I can remove the main bearing carriers. Inspecting the bearings shows some but not excessive wear and that they are of standard size see below. The only problem I have is that I didn't think to remove the front fan belt pulley before removing the engine. My fear being that I won't be able to undo the pulley securing bolt/nut now the engine is out off the tractor. If this is the case I can't remove the pulley and timing belt cover which in turn means I can't take out the crank.

If this is the case I will have to replace the bearings in-situ. Whilst this can be done its not ideal.

On a different note, despite the cold weather I've started to notice that the lighter evenings are coming. Perhaps the first signs of spring. In the back of my mind I'm conscious that I need to start the process of re assembly some time. At the moment all I seam to be doing is dis-ssembly. Lots still to do.