Total Pageviews

Showing posts with label Freguson TED20 Tractor Rebuild. Show all posts

Tuesday, 31 May 2011

Link Arms

OK, double posting for the price of one. Re-motivated that I've finally sorted the Top Link Rocker Bush my attentions have turned to the link arms. Originally removed during the dismantling process and stored.  The first job being to replace one of the Link Arm Ends. When I first got Tillie, one of the 'ball joints' was missing from one of the arms. I decided to replace this with a replacement weld on end. If this is successfull, I will proberly end up replacing both ends on both arms as they are all fairly badly worn. However for the meantine I decide to just replace one and leave the others for next winter.


Replacement end welded in position ready for fettling.

I now turn my attention to preparing the arms for painting. I favour using the two types of abrasive impregnated grinding wheels shown in the photos below. The solid wheel being very effective at rapidly removing paint and rust, with the orange coloured flexible brush good at producing a good finish and a getting into corners etc. These aren't cheap but I find more effective than traditional wire bushes.

Arms prepared I decided to prime both arms, fit to the tractor and then brush apply a top coat as shown below.
Whilst I have the paint to hand and after painting the Link Arms, instead of throwing the supplus paint away I decide to very roughly and without to much preparation bush paint the front wheels. These like the rear wheels are coated in various coats of grey, white, and green paint (see inside of rear wheel above and front wheels on the Blog header picture). Frankly, making Tillie look very shabby. I had originally planned to wire brush the wheels reprime and spray paint a top coat.

Anyway although only a quick botch job, just having the front wheels all one colour is a big improvement.
Not good on close inspection but from a distance a big improvement.

Saturday, 1 May 2010

New Rubber


Quick update,

Spotted a pair of rear tryes for sale on ebay. As Tillie currently only has grass tryes, thought these would complete the look. Deal done, a trip to Essex to collect and home.

Got home about midnight, with no sign of the trailer tailgate !!!!

Deciding that it couldn't have come off on the motorway, I retraced my route only to find it laying in the middle of the road in the next village to home. A real mystery how it became detatched ! But thankfully no damage done.

A quick hose down the next day and the tryes look good, brand new and unused a result.

Tuesday, 6 April 2010

Proof that Oil and Water Don't Mix

As variety is the spice of life I've decided to have a little break from the engine rebuild. So I set about removing the dash panel and battery tray ready for prepping the gearbox and axle for painting. I'm using a range of wire and abrasive coated nylon brushes in an electric drill to remove most of the old paint, muck and corrosion. Whilst tackling the steering box, water started to run from the bottom of the steering box casting. After about 200ml, the water changed to oil which in turn changed to a thick orangery sludge !
As can be seen from the first photo, note the running water !
Having allowed all the oil to drain and pushing out the sludge using a air pressure, I was left with a small hole in the ally casting. Interestingly this had showed no signs of leaking prior to me removing the old paint. I guess the oil is under no pressure so a bit of paint was sufficient to prevent any leaks. The hole can be clearly seen in the photo below.

Options for repair are either remove the steering box and take a trip to the welders or, fill the hole with a liquid metal or epoxy adhesive. I decide to go the epoxy route for both speed and cost. If paint stopped the leak then providing the surface is well cleaned epoxy should in theory have no problems.
Just visible in the third photo is the repair. I've decided to fill the steering box with a semi fluid grease instead of oil on the basis that this should limit any leakage from the steering arm seals. Hopefully the epoxy repair will hold and once painted won't be visible.

Saturday, 20 February 2010

Time to Split the Engine and Gearbox

This morning, I decided it was time to split the engine and gearbox. In the summer I noticed a oil leak from the drain hole located beneath gearbox bell-housing.
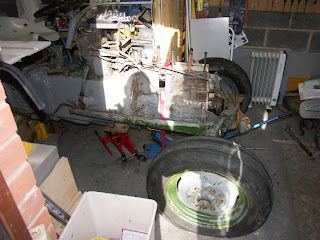
This leak indicating that either the crankshaft rear seal and or the gearbox input shaft seal needed replacing.

As I don't have access to an engine hoist, I decided that I would leave the engine attached to the front axle and once split from the gearbox 'wheel' the engine forward using the front wheels and a trolley jack under the sump for support.

As the engine weights approximately 150 lbs and the thought of it dropping on my toes wasn't part of my plan. I took the precaution of using a ratchet strap around the engine and trolley jack to ensure the engine remained centred on the jack and wedging the engine against the front axle using wooden wedges to prevent the engine 'spinning' once disconnected from the gearbox (see photo below).
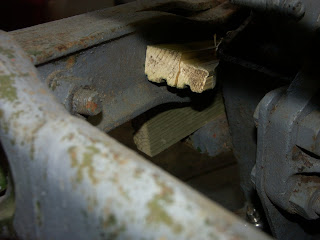
Having removed both track rods this left both the front wheels free to turn independently. Fearing this would cause a problem when moving the engine I took the additional precaution of attaching a piece of timber between the front ball joint mountings in order to ensure both wheels would remain parallel to each other. The timber can just be seen in the next photo at the front of the engine. Finally both radius arms were released from there gearbox mountings and splayed outwards slightly to clear the bell housing.

With all the engine/gearbox bolts removed but for two, I was ready to proceed. Slackening both bolts so that I had about a 10mm gap between the bolt head and the engine. I then called on the trusty foot of Geoff to push the clutch pedal down in order to 'break' the engine and gearbox joint.

The big moment ! unfortunately, nothing happened. A second go, still no luck. "Perhaps if we depress the clutch pedal instead of the brake ?" offered Geoff.
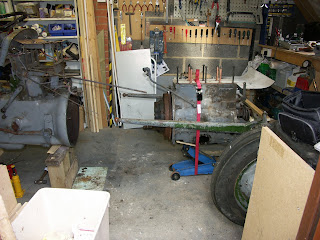

Two seconds later, and pressing the correct pedal this time, resulted in a satisfying 'Pop' as the engine moved away from the gearbox by 10mm . Totally removing both bolts and the engine was now free to be moved forward as seen in the photo opposite. The red ratchet strap around the engine and jack can also be seen in this photo.

Success a split engine and gearbox ! and surprisingly secure.

With the two parts now separated I could examine the clutch and investigate the oil leak. My first observations was of a worn thrust bearing and also badly worn fingers on the clutch pressure plate. In the photo to the left you can see where the front surface of the top finger has completely worn through !

The the pressure plate will therefore need replacing and a new friction plate. 150 quid of unwanted expense.

Now to identify the oil leak, having remove the clutch and flywheel there is plenty of oil on the engine casing. New seal definitely needed. Interestingly, the bottom crankshaft seal retaining plate has a bolt missing (see photo below). Further evidence of previous 'tamperings'

The pilot bearing in the flywheel is also knacked so I'm looking at the following parts;

Crankshaft seal, pilot bearing, flywheel locking plates, friction plate, pressure plate, thrust bearing and a gearbox input shaft seal.

Enough excitement for one day !

Monday, 25 January 2010

In the Warm

Latest progress, Half axle fitted, wheel back on and pushed into the garage. Wheels off (due to limited room).


A tight fit but Tillies in the warm for Winter, note the new and shiny left hand side brake drum and backplate.


I can now start the engine rebuild, first job has been to remove the cylinder head (see below).

On first inspection everything looks fine. I will replace the head gasket and check a few other components such as the valves and timing chain.

Hopefully I can then start to reassemble her and start the repainting process.

On a recent trip to a local pub I noticed a poster for a Summer fete, including a show of classic cars and tractors. The Fete's in June. Its about a 7 mile journey across the Ridgeway so I now have a target to aim for and potentially Tillies first show!

Wednesday, 20 January 2010

Last Rear Axle (hopefully)

Christmas, New Year and 6inches of Snow, its all been and gone since my last update. In fairness its been a period of relative inactivity on the tractor front. To cut a long story short, I managed to well and truely bugger my half shaft. Having stripped the thread on my bearing removal tool, I lost the plot and tried to press the bearing off using a hydraulic press.

2000 PSI later I ended up with the bearing still in the same place and a distorted bearing carrier ! As a result the half shaft has been sent to the great big scrap metal yard in the sky.

Despite this disappointment, the refurb of the rear brake and hub have been successful (see below, note homemade gasket RHS of photo's). Back to the half shaft, second hand item sourced from Swindon for £30 complete with a brake drum, result ! Last Saturday, working in the remains of the snow, I therefore bit the bullet and refitted the replacement half shaft and refurbed brake to the tractor. This was a pretty straightforward task and enabled me to refit the back wheel (below - photo of half fitting).

With the wheel refitted I can now think about moving the tractor inside for my next task, the engine overall.


Tuesday, 6 October 2009

Rear Axle

Perhaps the Cider making was to much. Last Sunday I noticed a ominous looking leak from the nearside rear brake drum. It appears an oil seal (in fact two most likely have failed, allowing the rear axle's oil to escape. See pic below

Some research on the FoFH forum suggests I have a challenging task in front of me. The outer seal appears to need the half shaft and associated wheel bearing removed. The inner seal is easier in that once the half shaft and axle housing is removed the seal is a more straightforward replacement.


Picture above shows the brake drum removed. Process is slow as I've never attempted this before and nothing seems to want to come apart. Having drained down the rear axle oil this looked emulsified and in poor condition.
With the dark nights drawing in, its a weekend activity (my garage isn't big enough to fit tractor and remove the half shaft).

Thankfully, the brake shoes and drum look in reasonable condition. So new bearing and seals is the first job.

Saturday, 5 September 2009

Road Legal

So having returned from holiday. I have two free days to spend on the tractor. I've set myself two tasks, the first (on Thursday) to take my documentation to the DVLC offices in Oxford in order to obtain a registration document and registration plate number.
Full of confidence, I arrived at the offices. A 45 min wait according to the ticket/queueing system. H'm, not a good start. 40 mins later, my turn has come. I present all my documents, plus four photos of the tractor only to be told that the tractor may need to inspected ! Surely not, more delay.
When I ask why ? the less than helpful assistant, is clearly only use to dealing with the standard lost tax disc type enquiries. Anyway, I leave all the information with her and leave somewhat crest fallen. I had hoped the whole process would have been far simpler.
The second task I have planned is to start the process of removing all the old layers of paint from tractors gearbox and back axle (see below).


A day later I'm pleased with the results and much to my surprise a envelope arrives today with a Tax Disc and confirmation of my registration number plate. I can only assume someone at the DVLA office has applied some common sense.


Re infused with excitement, I spend Saturday, applying the registration number to the front of the tractor, more painting, attaching my new tax disc and adding Tillie's name' to left hand side of the bonnet.
Tillie, Taxed, and Named.